a bit of simple DIY often turns into a full demolition job. I started to remove the old hot-water tank from above the range, in preparation for decorating the maid’s room behind our bedroom. We need the room to be ready for a WWOOFer who is coming for a month in August.
Removing the water means:
- Dismantling the boxing-in
- Removing the old hot water connection to the utility room
- Draining the range
- Draining the water tank
- Connecting the utility hot water tap to the hot supply to the kitchen
- Cutting all the pipes into and out of the water tank
- Removing the electric supply to the immersion heater in the tank
- Rebuilding the boxing-in around the cold supply to the utility room
Dismantling the boxing-in
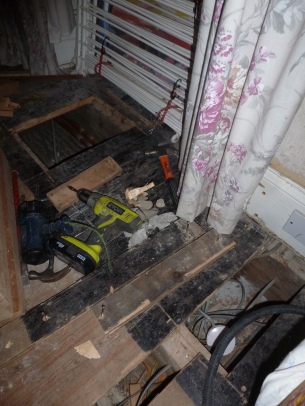
I didn’t document much of this. Here is what is left after the initial work. I took out the outer part, then removed the water tank before moving onto the final part of the framework.
Removing the old hot connection
The range supplied hot water to the utility room, so I had to cut that connection and add a blank end where I’d removed the connection. That would allow me to connect the new hot water system to the utility hot tap. The old hot water system was now disconnected from the water supply.
Draining the range
Also known as flooding the utility room. The range has a back boiler that I needed to drain before I cut the pipes to the water tank (there is a small header tank driving the heating coil which is also attached to the range’s pipework). There is a valve and drainage pipe for this but the valve had seized and I couldn’t free it. So I cut the valve out and tried to catch the water. I didn’t catch much of the initial gush and flooded part of the utility. The gush slowed and I got most of the rest of the water. The best bit: I found the valve had an allen key hole that I could have used to open it and avoided the flood.
Draining the water tank
Naively I thought that disconnecting the hot water system and draining all the pipes and range would leave the water tank empty. Well that’s not the case as I found out when disconnecting the “in” pipe for the water tank. I quickly tightened the nut and retreated (with a fair bit of dripping into the utility for good measure). It was time to get the hose into the house and attach it to the drain cock (another new term for me). This is a forked valve: an exit to a hose connection and a washer that covers the exit until you open the valve at the other fork. However, after trying three different hoses there was no water coming out.
I found the answer on YouTube (rip the valve and washer out, then jam your thumb over the hole to keep the water going down the pipe).
So I spend 45 minutes with my thumb pressed over the open end of the valve where I had ripped the washer out. It wasn’t wasted because I got to catch up on Only Connect on the iPlayer app on my phone.
Connecting the utility hot water tap
An easy one. The kitchen hot water was already connected through the wall. I just had to open the valve and rely on the blank end I’d installed.
Cutting all the pipes into and out of the water tank
A fun one because I used an angle grinder rather than a pipe cutter. We now have metres and metres of all different copper pipe diameters. It’s probably our most valuable asset now. Cut pipes from range into the water tank shown.

The most complicated part was extracting the bent pipes through the ceiling. The plumbers had obviously put a slight bend on them, shoved them under the eaves, then caught and bent them in the room below. I got them out in the end.
I also had to chase the pipes to the range under the floor by removing floorboards along their run. The plumbers had removed section of floorboard as they’d laid the pipes so I lifted those sections to undo their work.
Removing the electric supply
More chasing about under floor boards. This time it was the whole width of the room to find where the wire came up from the switch in the utility room. The boards had been mangled in the original work so required a fair bit of TLC when laid back down.
Rebuilding the boxing-in
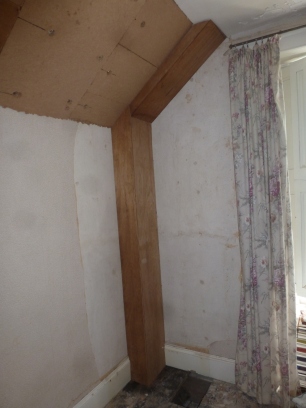
The final task was to box in the cold water pipe to the utility room. This is a “if it’s not broken, don’t fix it” decision: the tap works fine so don’t start drilling through walls and routing pipes all over the place. The angles were all cut for the original boxing-in, so I just had to adapt the width and height a little (sloping insulation had reduced the height).
This was a deceptive job because it took me all day on Sunday (until 11pm) to build it, including tidying, a bit of plastering and installing the final bit of insulation. All I had to show for it was two vertical bits of wood and two sloping bits.
Conversely, putting the board on went super-fast; it’s all in the preparation. Here is the final structure.


